How to Enable Gemini 3 'YOLO Mode' (Turbo) in Google Antigravity
How to Enable Gemini 3 “YOLO Mode” (Turbo) in Google Antigravity
Environment: Google Antigravity IDE / Gemini 3 Pro & Ultra
Goal: Unlock fully autonomous “Vibe Coding” capabilities.
In the era of AI-assisted development, constant permission prompts can kill your flow. While Google Antigravity defaults to a safe, “ask-first” approach, there is a hidden setting that allows Gemini 3 to take the wheel completely.
Community members call it “YOLO Mode,” but officially, it’s known as “Turbo.”
Enabling this allows Gemini 3 to execute terminal commands, install dependencies, and modify files without interruption. This guide shows you how to turn it on and—more importantly—how to control it safely.
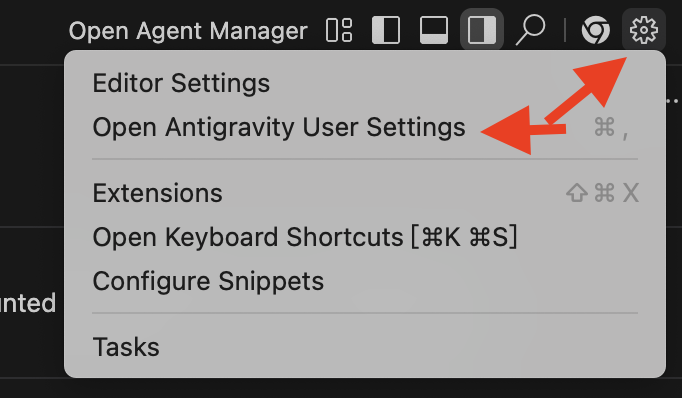
⚙️ Step 1: Access Antigravity User Settings
Unlike VS Code’s bottom-left layout, the critical settings for Antigravity are located in the top-right corner.
- Move your cursor to the top-right corner of the IDE window.
- Click the Gear Icon (⚙️).
- Select “Open Antigravity User Settings” from the dropdown menu.
- Pro Tip: You can also use the shortcut
Cmd + ,(Mac).
- Pro Tip: You can also use the shortcut
🚀 Step 2: Enable Turbo Mode
Once in the settings tab, you need to modify the Agent’s execution permissions.
- Navigate to the “Agent” tab in the left sidebar.
- Scroll down the right panel until you find the TERMINAL section.
- Locate the “Terminal Command Auto Execution” setting.
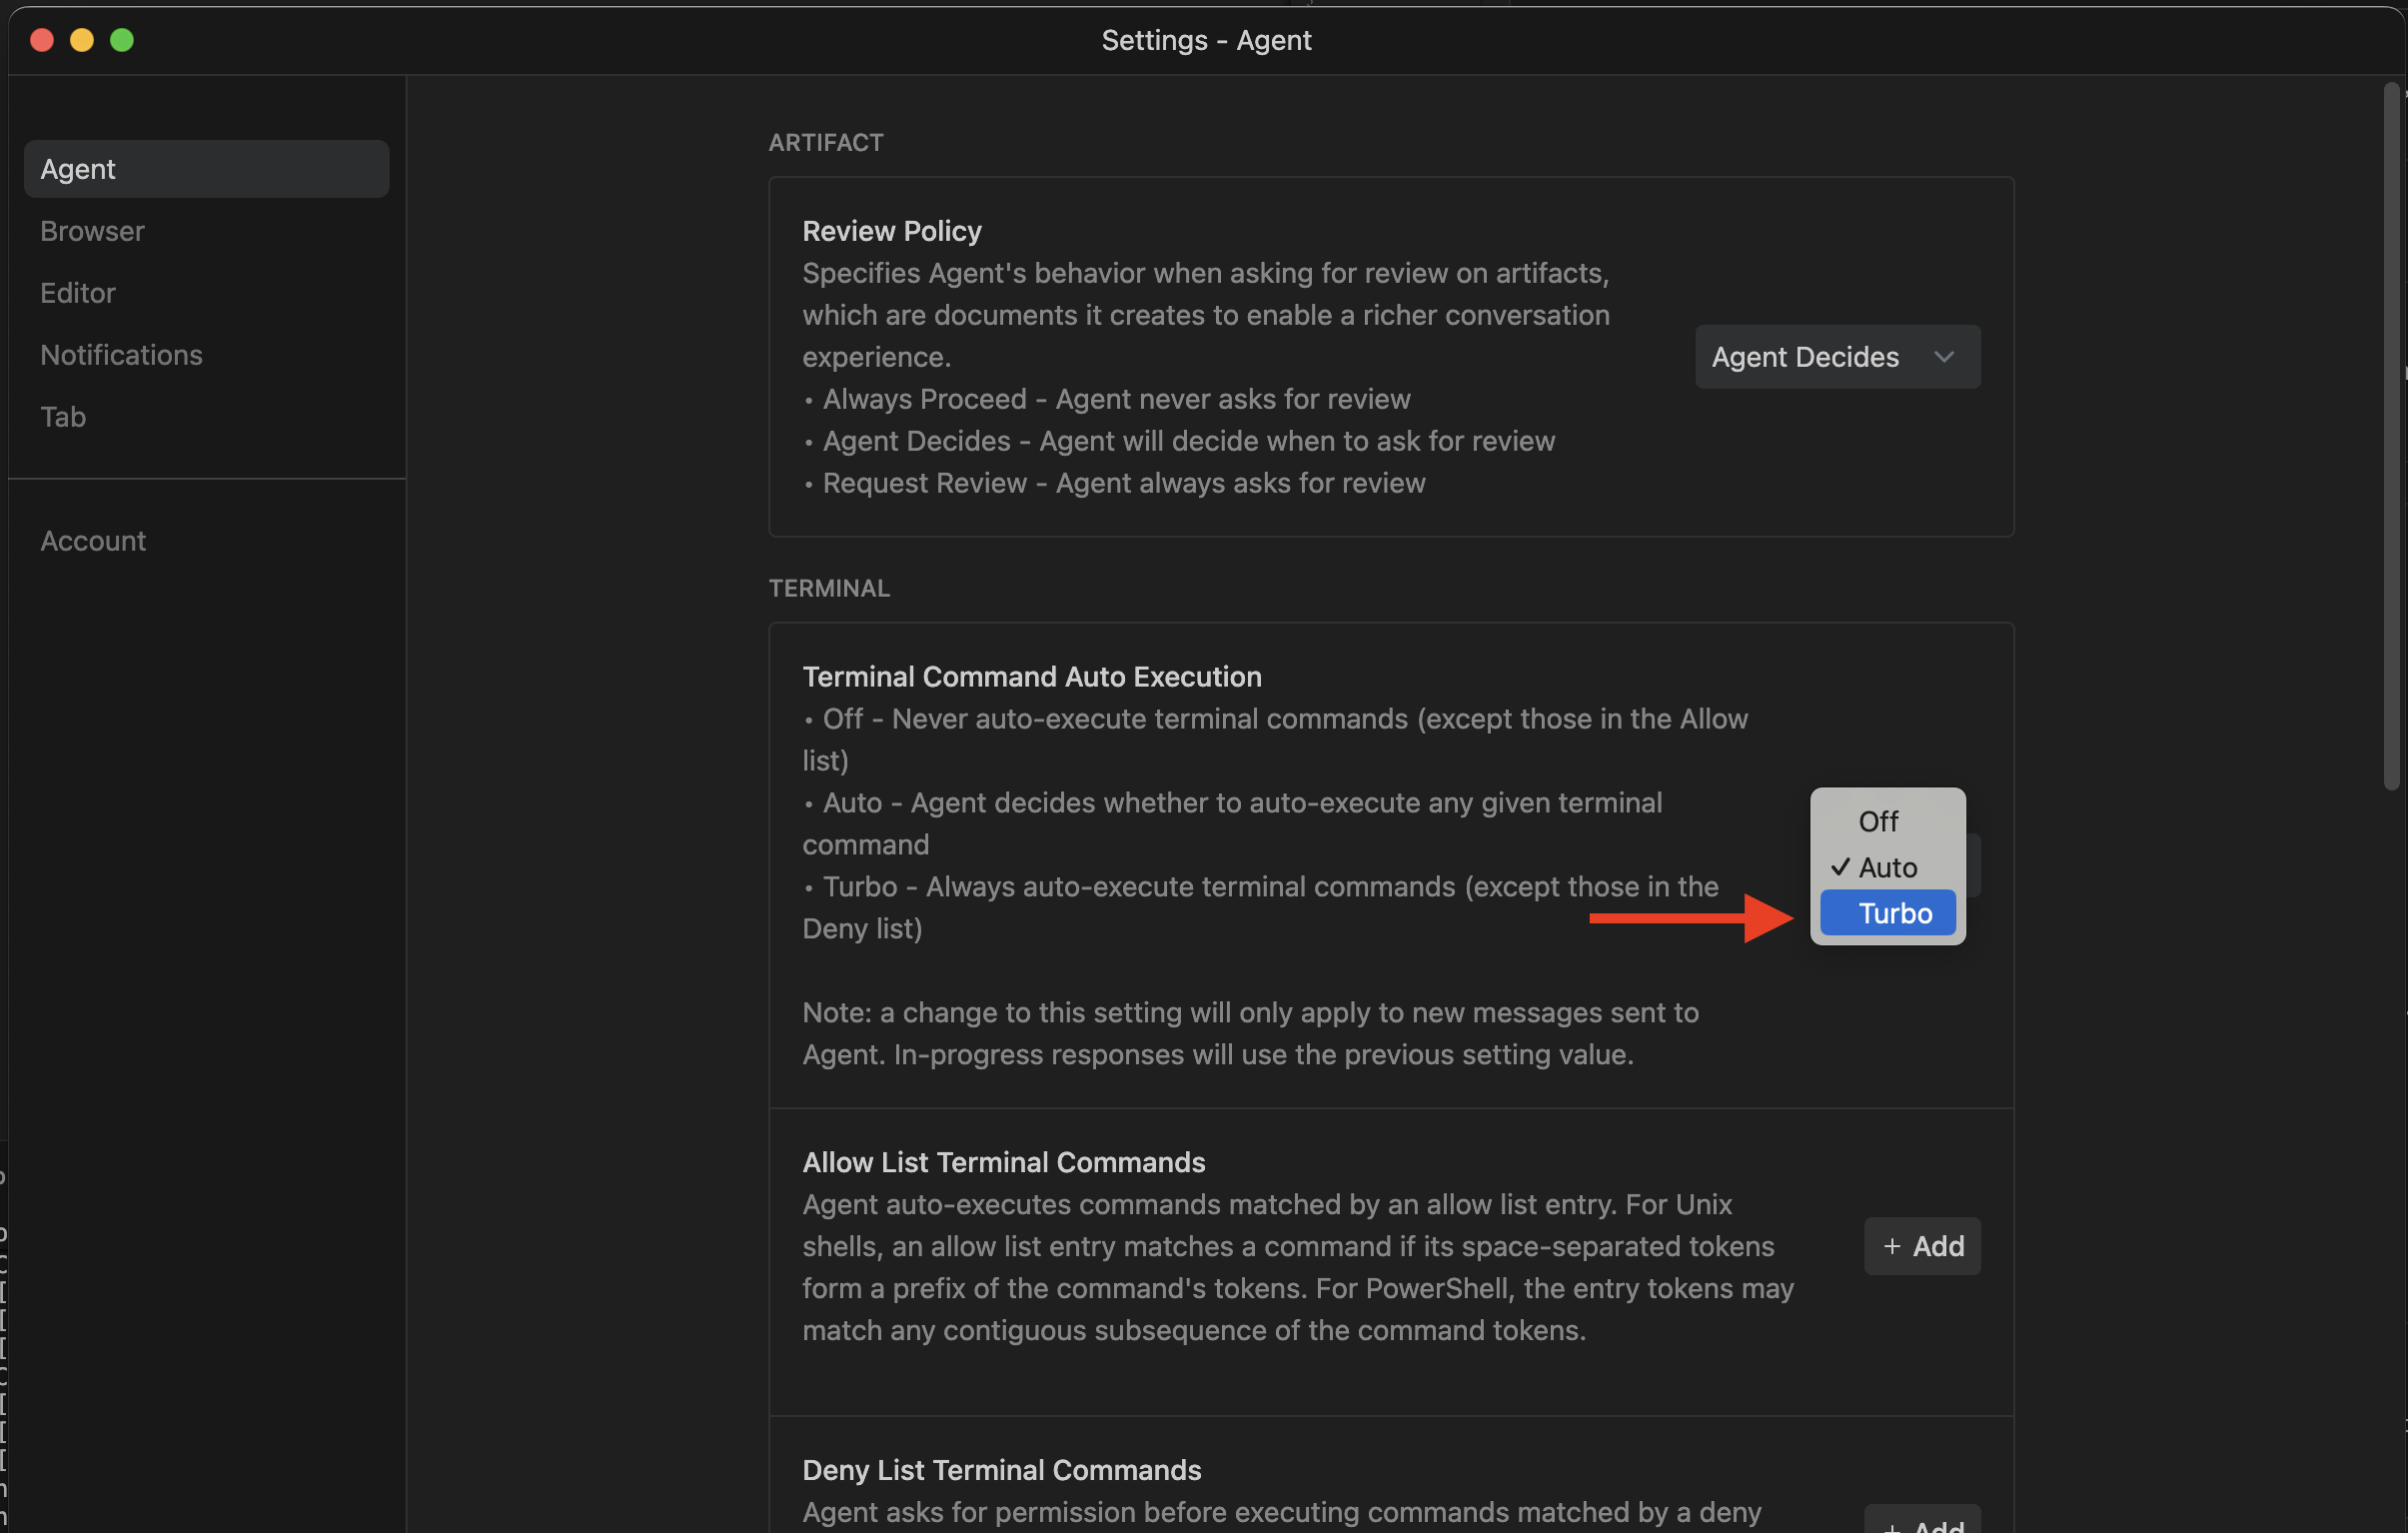
Action:
- Click the dropdown menu (default is usually “Auto”).
- Select “Turbo”.
What does Turbo mean?
- Off: Never auto-execute.
- Auto: The Agent decides when to ask (can be inconsistent).
- Turbo (YOLO): Always auto-execute. Gemini will no longer ask “Can I run this?”. It will immediately execute shell commands, start servers, and run tests.
💡 Crucial Workflow: The “Accept All” Paradox
⚠️ Important: This is the secret to using Turbo mode effectively.
After enabling Turbo, you will notice that Gemini executes commands instantly, but a generic “Accept All / Reject All” dialog still appears for code changes.
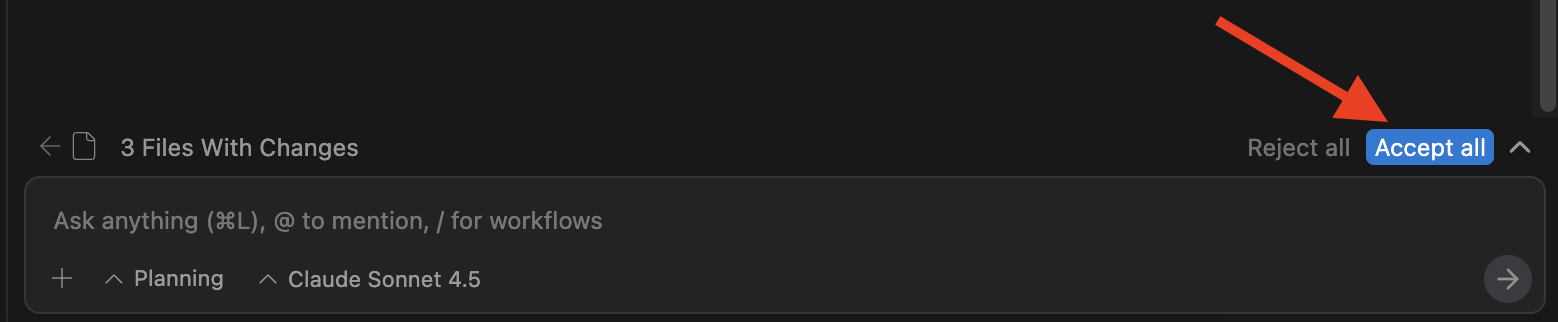
Do not disable this. Understand it:
- Write-First Execution: In Turbo mode, Gemini acts before you confirm. The file changes are already written to disk so that subsequent terminal commands (like
npm run build) can run against the new code immediately. - “Accept” is Optional: Since the code is already live, you don’t actually need to click “Accept All” for the code to work. You can leave the prompt floating.
- “Reject” is your UNDO button: The real purpose of this prompt in Turbo mode is for safety.
- If Gemini breaks your app or deletes a critical function, click “Reject All”.
- The system will instantly revert the file to its previous state (using the cached diff), acting as a “Magic Undo.”
The Workflow: Let the Agent drive. If it works, ignore the prompts. If it crashes, hit “Reject All” to roll back.
🛡️ Safety Recommendations
Turbo mode grants the AI high-level permissions on your machine.
- Configure the Deny List: deeply in the settings (below the Turbo option), ensure you add dangerous commands to the “Deny List Terminal Commands” (e.g.,
rm -rf,format, system-level changes). - Sandboxing: It is highly recommended to use this mode inside a Docker container or a remote development environment to prevent accidental system damage.
🎯 Ready to Vibe?
Your IDE is now a fully agentic platform. Try giving Gemini a high-level goal:
“@Gemini /new Create a Snake game using Next.js, install all dependencies, and launch the dev server for me.”
Then, take your hands off the keyboard and watch the magic happen.
💬 Endorsement
“The true power of models like Gemini 3 is unleashed when you eliminate friction. Turbo mode is a non-negotiable step toward true agentic autonomy.”
— David, CEO of Ray3.run